| Subtabs | Description |
|---|---|
| Leaks | Manage open leaks or access records of closed leaks. |
| DORs | View, edit, or close your open DORs, as well as to add documents and attempt records. Or Access the Closed DORs grid to manage your closed DOR records. |
| Shutdowns | Manage your existing shutdowns or add new ones. Shutdowns can be set to either LUnit or Process Unit. In addition, you must enter a name, description, start date and end date. Expected Emissions are optional. |
| AVO Events | See AVO Events. |
| Leak Alerts | Setting automated emails to alert new or current leaks. |
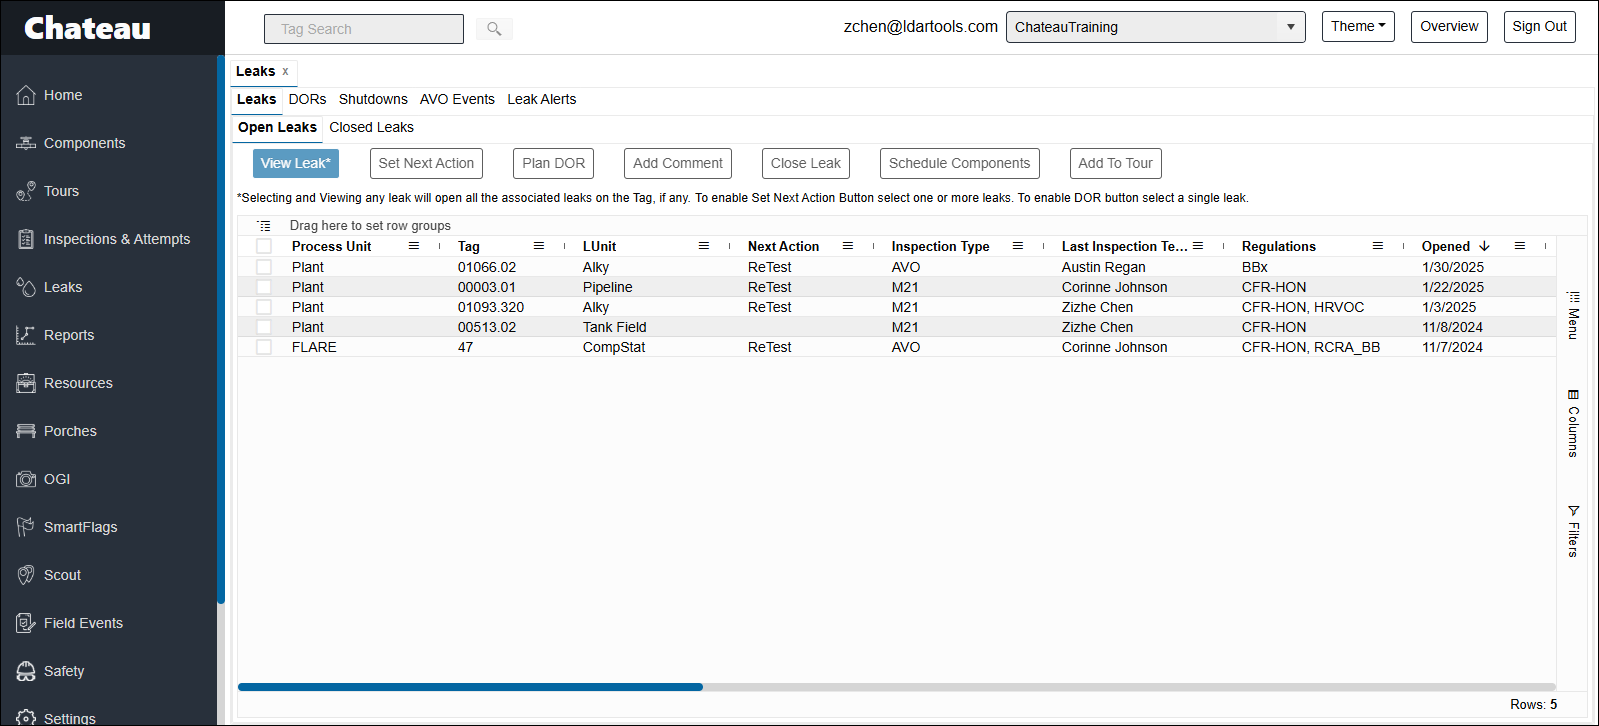
In the Grid
Leaks are triggered by failed inspections. If you wish to add a leak manually, please do so by adding the inspection record that triggered this leak. Refer to the Inspections article for instructions on adding an inspection.
| Term | Description |
|---|---|
| Leak Actions | The 7 action buttons above the Leak Grid. |
| Associated Leaks |
Set of leaks on the same component but generated by different leak definitions or leak response days according to different rules. Example: if Tag 17 had a 1,100 PPM reading which created a leak for Rule A (at 500PPM) and Rule B (at 1,000PPM), then Chateau had TWO leaks, but recognizes they are sharing the same component and inspection. Any time you select one of the sets, the other members of the shared set are also selected. If you open one of the leaks, a tab for the other(s) will open as well. |
| Regulation | This is generated by Chateau’s Rules Engine. You cannot edit it. If more than one regulation are affected, they will all be listed. |
| Waiting Action | This tells you how many days you have been waiting at the current Action state. |
| Work Order | Assign a work order number to a leak by opening the leak and entering it. You can view and sort work order numbers in the grid. |
| B & C in Due Dates | B indicates it is due in Business Days, while C indicates it is due in Calendar Days. Please see here for the details of leak response deadlines in Business Days. |
| Final Resolution Due | When the Final Resolution is due on a leak based on the rule applied. |
| First Attempt Due | When the First Attempt is due on this leak based on the rule applied. |
| First ReTest Due | When the first ReTest is due on a leak based on the rule applied. |
| Next Action |
The Next Action required on a Leak; e.g., Report to Maintenance, Await Maintenance or ReTest. Next Action for leaks can be set either via the button above the Leak Grid, or in the Individual Leak View. For DORs, you have to set the Next Action in the Individual DOR View. Setting the Next Action does not automate any of the actions. For example, if you select ReTest as the Next Action, you will still need to add the component to a ReTest tour or schedule it for ReTest. Instead, it starts counting days on Waiting Action so you can keep track of the response progress. |
| Secondary Leaks | A leak found on an existing leak at a higher PPM after an Attempt and ReTest on an existing leak. |
| Trigger PPM | The PPM which triggers the Leak for the applicable regulation. |
| Emission Point |
The point of the component on which the leak was detected; e.g., Bonnet, Stem or Cap. The Leaks grid displays all emission points on record for this component. You can customize the options for emission points at Settings / Picklists / Category=Leaks; the picklist name is “EmissionPoint.” If the wrong emission point were entered, you can edit it here. |
| Tour | If the leak was added to a tour, the name of the tour will appear in this column. |

| Next Action | Waiting Action | Description |
|---|---|---|
| Report to Maint. | 2 days | You have been waiting to report this leak to Maintenance for 2 days. |
| Await Maint. | 8 days | You have been waiting to hear back from Maintenance for 8 days. |
| ReTest | 1 day | You scheduled this for ReTest yesterday. |
| ReTest | 0 days | You scheduled this for ReTest today. |
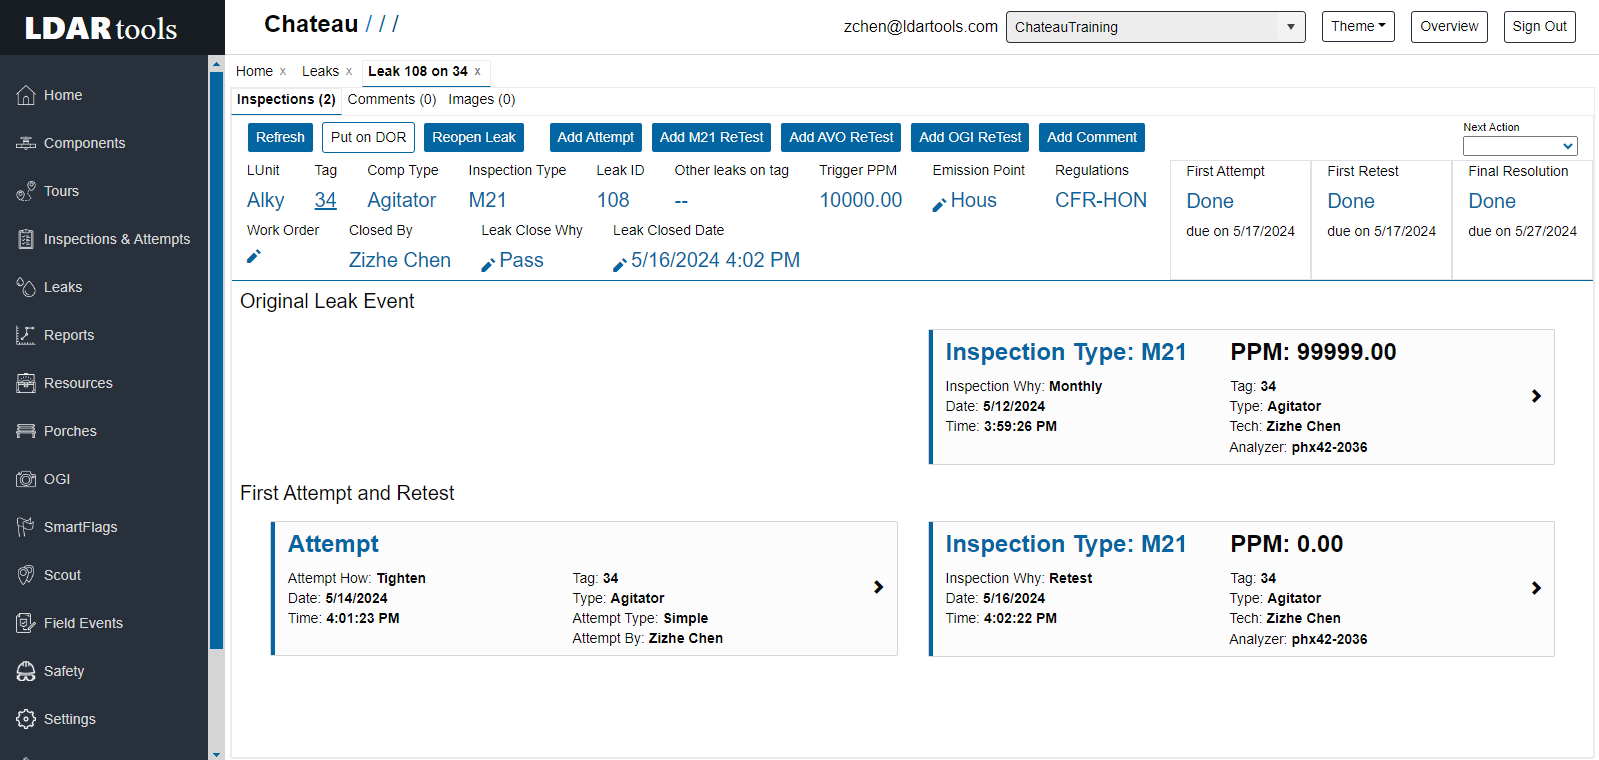
Leak Details
| Action | Process |
|---|---|
| Add Attempt | Add records of attempts manually here. |
| Add M21/AVO ReTest | Adding inspection records manually. M21/AVO Why=ReTest |
| Tag | Click the hyperlinked number to open Tag View. |
| Work Order | Click the pen icon to edit the work order number. |
| Next Action | Select the next action for this leak. |
| Leak Event Tiles |
Shows the original event that triggered the leak, and Attempts/ReTests, if any. Click on the tiles to view or edit the inspection records. You can also add documents to the inspections.
|
| Comments | View and add comments in this tab. |
| Images | View target and inspection images. |
| Emission Point | The point of the component on which the leak was detected; e.g., Bonnet, Stem or Cap. The Leaks grid displays all emission points on record for this component. You can customize the options for emission points at Settings / Picklists / Category=Leaks; the picklist name is “EmissionPoint.” Click the pen icon if you wish to change the emission point. If the wrong emission point were entered, you can edit it here.
|
Note: Chateau takes into account the time of an attempt when associating it with a leak. For example, if a repair attempt has a time performed 5/2/24 11:24 AM, and the leak closed time is 5/2/24 10:23 AM, the repair attempt will not show up on the leak records, leak reports or DOR reports. The Repair attempt’s time performed should be adjusted to before 5/2/24 10:23 AM, or the leak closed time should be advanced to after 5/2/2024 11:24 AM.
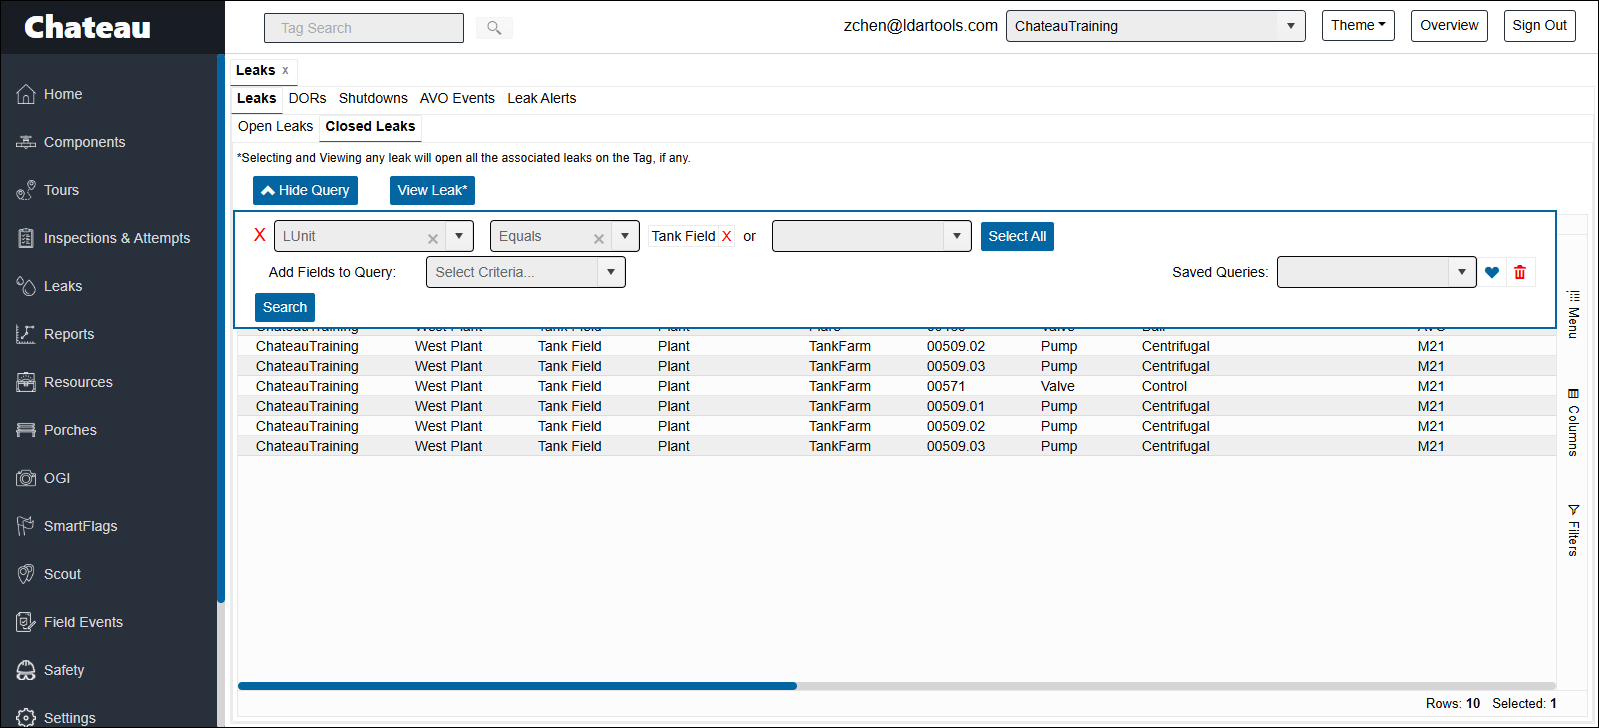
Closed Leaks
In this tab, you can enter a query to see closed leaks meeting the query’s criteria. You have the option to view each individual leak’s details and re-open them.