Click here for a printable version of this procedure.
Items Needed
| Part Name | LDAR Part # |
|---|---|
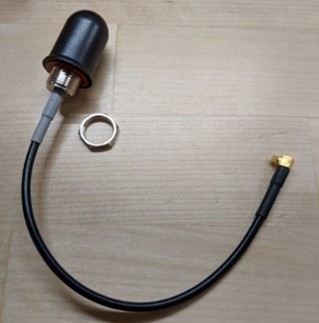
| Antenna | 42051 |
| Antenna Wrench* | 6022 |
| Angled Wire Cutters* | 1741 |
| Zip-Tie | 927 |
| Straight Edge Screwdriver | n/a |
| phxApp to Test Bluetooth Signals | n/a |
*Included in phx42 Level 1 Tool Kit (LDAR# 4203)
-
Remove the original antenna.
-
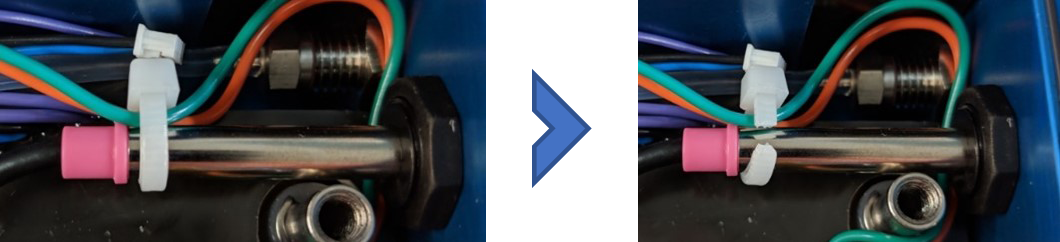
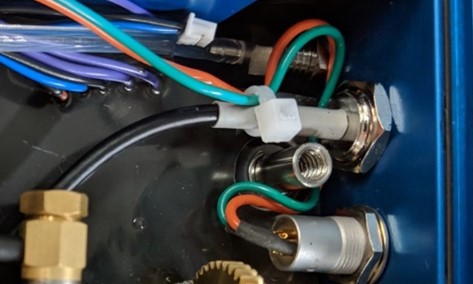
Cut the white zip-tie holding the charging wires to the base of the antenna. Remove and discard the zip-tie.
-
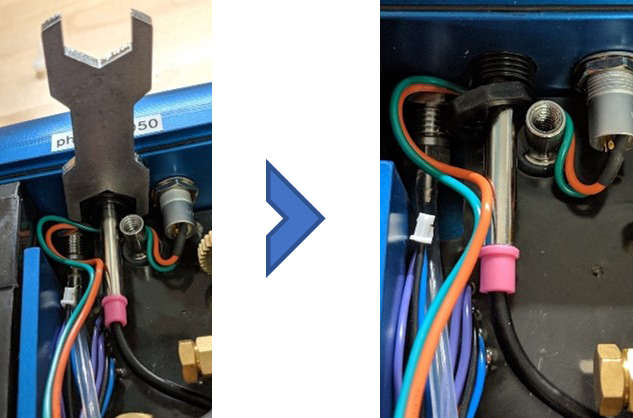
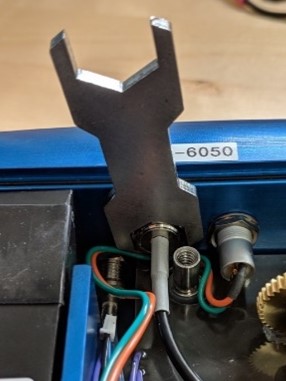
Use the double-ended antenna wrench to loosen the plastic bulkhead nut of the antenna, using the larger opening on the wrench for the plastic bulkhead nut.
-
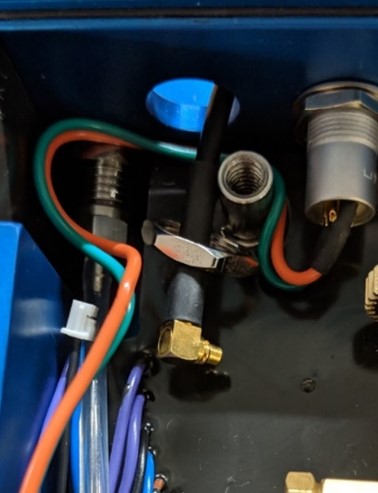
Unplug the connector for the antenna.
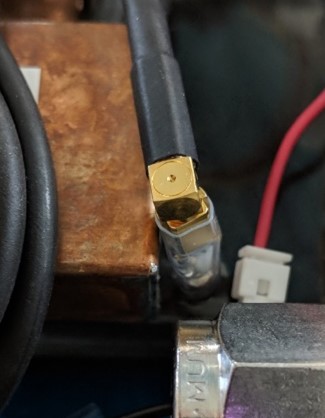
-
Look at the connector and identify the split between the connector on the antenna cable and the connector coming out of the mainboard potting.
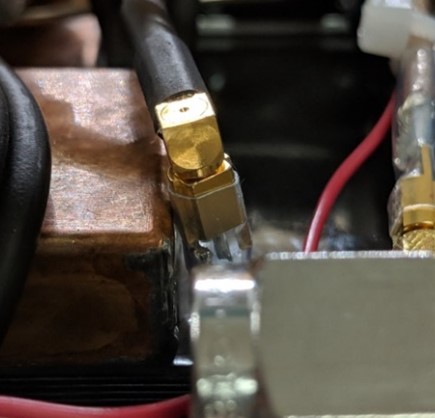
-
Using the wire cutters, very gently place the cutter edge on the split line between the connectors identified above.
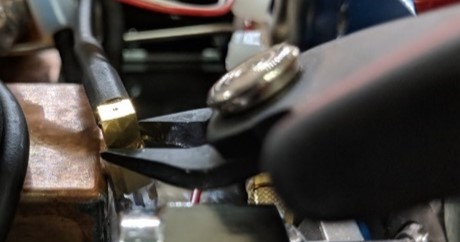
-
Carefully start to close the cutter until the two connectors separate.
-
-
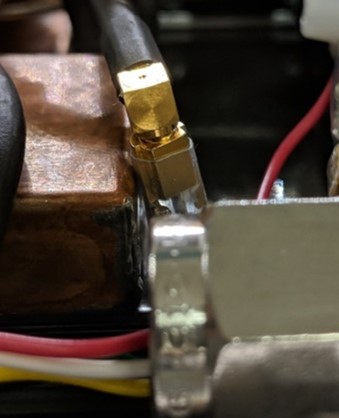
Using the tip of the screwdriver, push the antenna out of the front of the phx42 unit while guiding the cable out with it. There is an adhesive between the base of the antenna and the phx42 housing, so you may need to apply constant, gentle pressure to break the connection.
This process may go more smoothly if you use the wire cutters to snip and remove the plastic bulkhead nut.
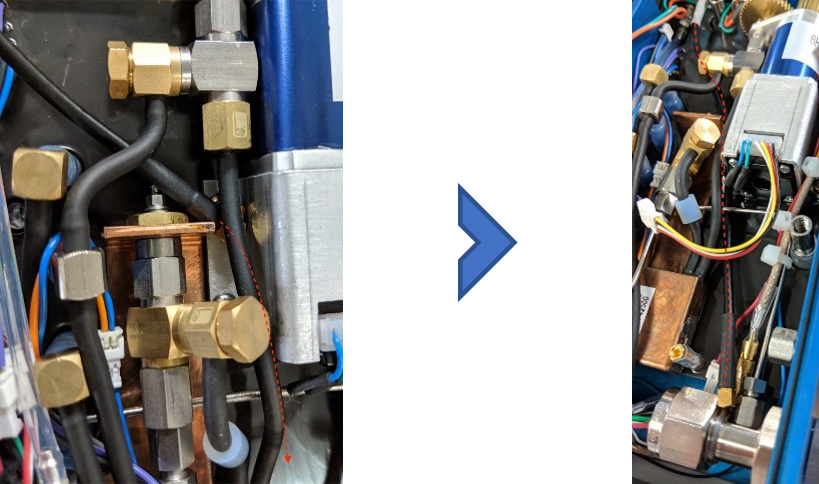
Pay attention to the route the cable takes through the unit. The cable passes UNDER the motor needle valve manifold and OVER the steel line. This will be the same path we want to follow when installing the new antenna cable. -
Discard the old antenna and zip-tie.
-
-
Install the new antenna.
-
Remove the bulkhead nut from the new antenna. Using the tip of the wire cutters, remove the cover on the double-sided tape around the base of the antenna.
-
Feed the antenna cable through the hole in the face plate of the phx42.
-
Slide the nut over the cable and start it on the threads of the antenna.
-
The antenna’s cable will need to be routed under the tubing coming out of the motor needle valve and the solenoid and then over the steel line.
-
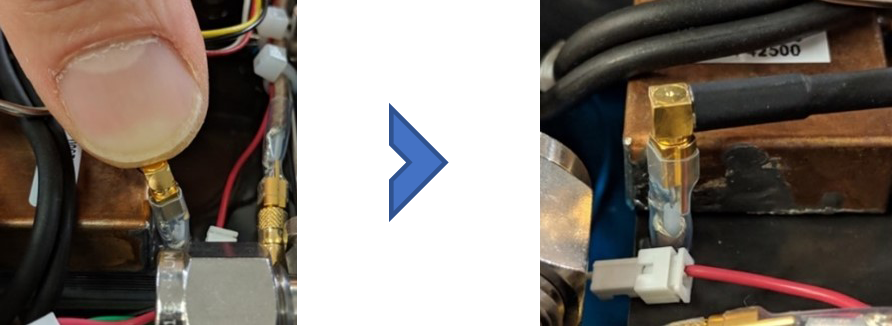
Once routed, simply push the cable connector into the connector coming out of the mainboard. Confirm the phx42 is powered on and refresh the phxApp to ensure the new Bluetooth is discoverable.
-
Finish tightening the bulkhead nut on the antenna with the antenna wrench.
-
Zip-tie the green and orange charging cables to the base of the antenna. Trim the zip-tie accordingly.
-