Creating tours directly from the Schedule allows for better organization and efficiency. Follow these steps to build both recurring and one-time tours.
Understand the Schedule Setup
Before you begin, ensure you are familiar with:
-
Schedule Terms – Understand key definitions and functionalities.
-
Filtering a Grid – Learn how to refine data to display only what you need.
-
Designing & Saving a Grid Layout – Customize your view and save layouts for future use.
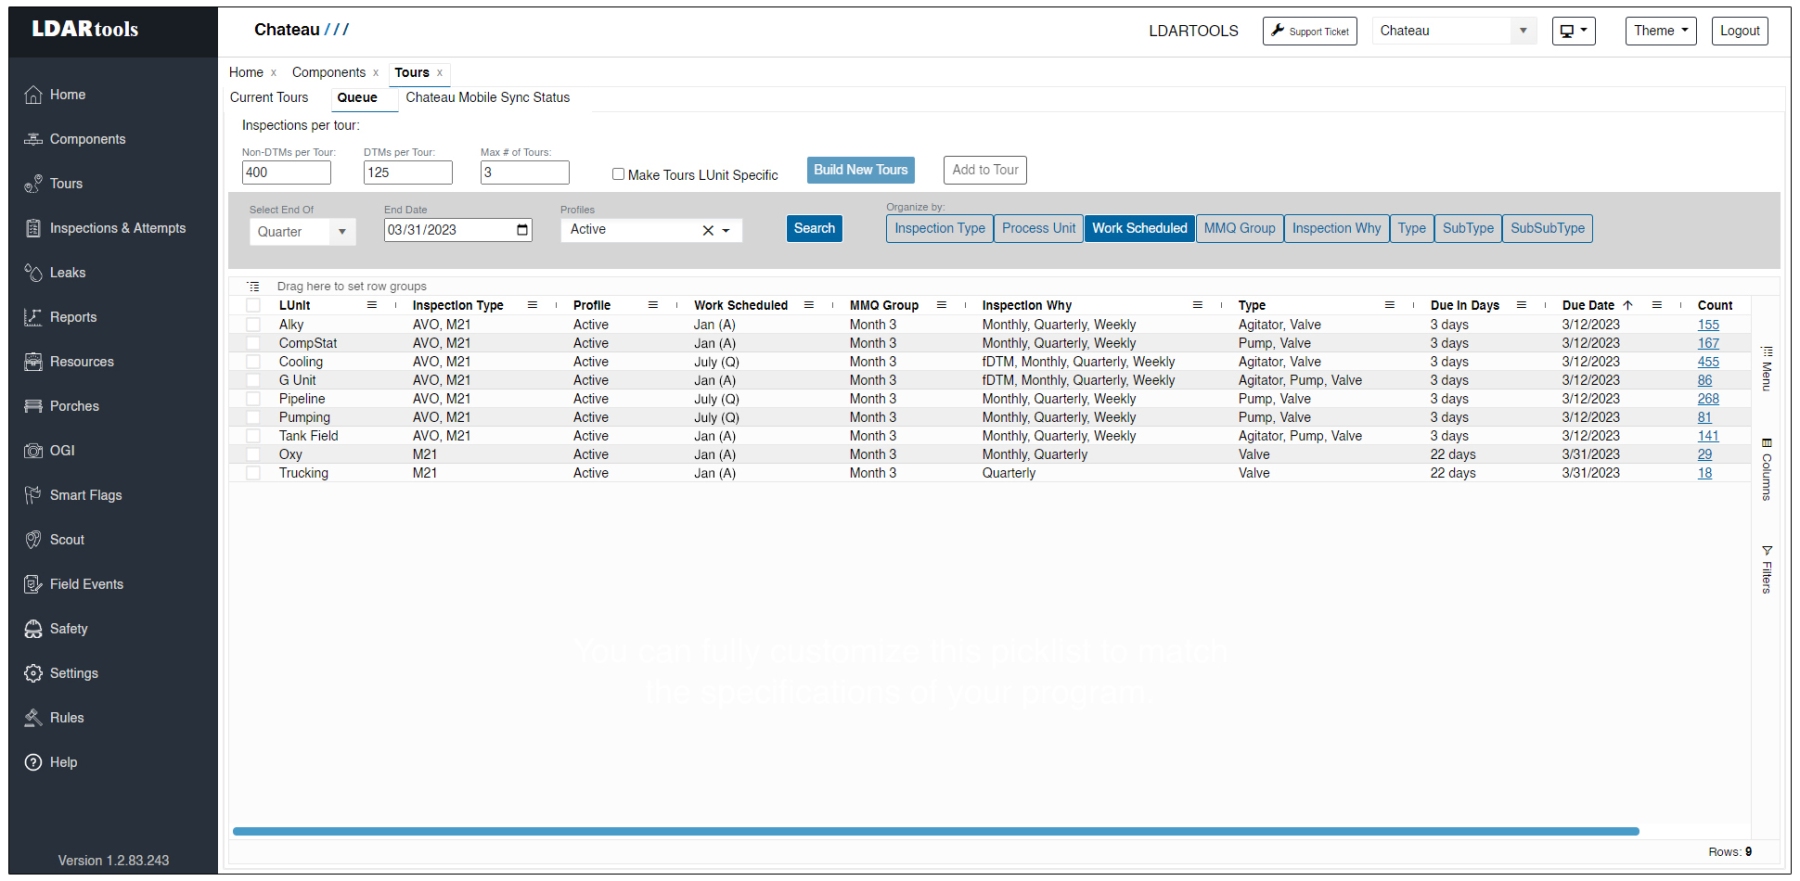
Build a Sample Grid
-
Select an End of setting, or manually enter an end date.
-
Choose component properties to organize your rows in the Organize By section.
-
Example: If building tours based on Process Unit or Work Scheduled, select those options to enable sorting and filtering.
-
For a tour based solely on Control Valves, enable the Sub Type box.
-
Avoid enabling unnecessary options, though settings can be adjusted later.
-
-
Click Search to generate results.
Customize & Save Your Grid Layout
-
Select the columns you want to display in the menu.
-
Arrange and sort the columns in your preferred order.
-
Resize the columns for optimal viewing without excessive scrolling.
-
Once finalized:
-
Click Menu > Save Grid Layout.
-
Follow the onscreen prompts to save the layout for future use.
-
-
To reload your saved layout in the future:
- Click Menu > Load Grid Layout and select the desired view.
Build a Recurring Tour (e.g., Monthly Pump Tour)
-
Build the grid.
-
Set the “End of” setting or date.
-
Ensure only active components are included.
-
Adjust Make Tours LUnit Specific (uncheck this option if you want multiple LUnits in the same tour).
-
Click Search.
-
-
Refine the grid layout.
-
Use the funnel icon in the column headers to filter specific components (e.g., Pumps only).
-
Include AVO with M21 inspections, if necessary.
-
Select all relevant components.
-
-
Save this layout for future use. Examples of useful layouts:
-
Monthly Pumps – No AVOs
-
Monthly Pumps – Due AVOs
-
Weekly AVOs Only
-
Create the Tour
-
Display the saved layout.
-
Select Components.
-
Click Build New Tours. The tour will now appear in the Current Tours tab.
Convert to an Evergreen Tour (if needed)
-
Open the Current Tours tab.
-
Select the tour.
-
Toggle the Evergreen setting.
Build a One-Time Use Tour
-
Load and filter the grid for specific component groups.
-
Use the Inspections per Tour setting to generate multiple tours at once.
- Examples: All Components, Connectors Only, DTM Only, etc.
- Examples: All Components, Connectors Only, DTM Only, etc.
-
Click Build New Tours to create and save the tours.
- Note: The final number of inspections may differ due to detector requirements and REN Attachments.
- Note: The final number of inspections may differ due to detector requirements and REN Attachments.
-
Your tours will appear in the Current Tours tab. If you do not save a layout, you will need to repeat this process each time.
See Build a Tour from the Component Grid for information on how to build more specialized types of tours from the Component grid.