| Item | Description |
|---|---|
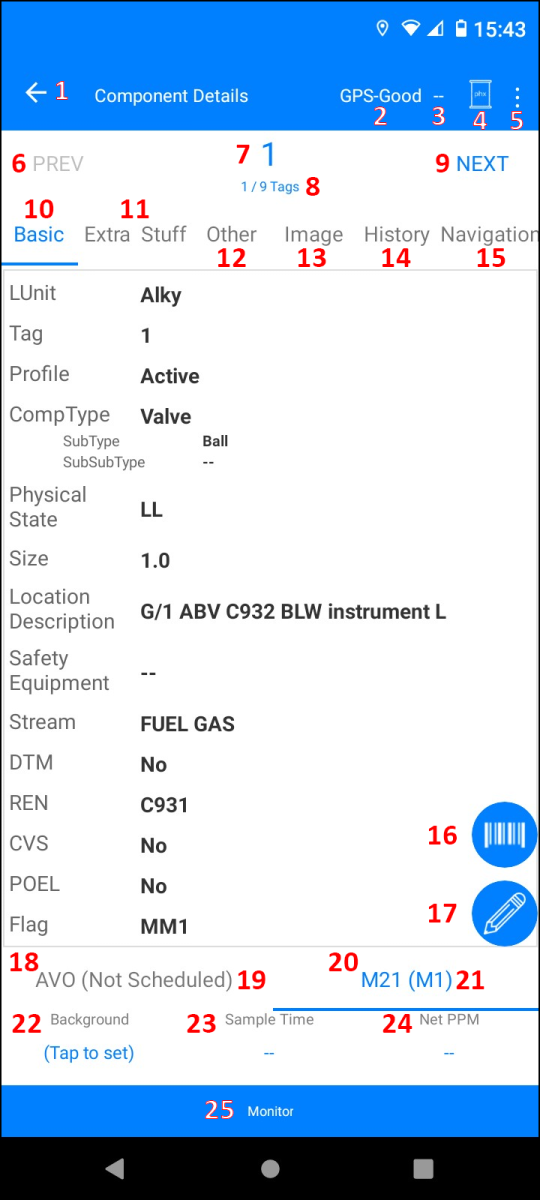
| Android Status Line | This will vary based on the version of Android. |
| 1. | Returns you to the Quick View Screen. This does NOT take you back to the previous Tag (see #6). You can also refer to this button to return to the previous screen and view the GPS map. |
| 2. | Describes the status of your GPS connection. |
| 3. | Current PPM reading sent by the VOC analyzer. When using manual analyzer input, you can also click here to set the background. |
| 4. | Connect to the VOC analyzer by tapping here. |
| 5. | Menu of all non-monitoring items that are enabled, plus Copy to Add and Add from Scratch. |
| 6. | When this is not the first tag in the sequence, PREV will appear in blue. Clicking it will take you to the previous tag. |
| 7. | Tag number |
| 8. | Shows the order of this tag in the current sequence. |
| 9. | Takes you to the NEXT tag in the current sequence. |
| 10. | Shows the properties of this tag. Blue lettering means it is selected, while gray lettering would indicate it is not. |
| 11. | Extra information, if enabled. |
| 12. | Extra information, if enabled. |
| 13. | Tap here to see an image of this component. |
| 14. | Tap here to see the inspection history of this tag for today. You can add a comment to inspections or delete inspections here. |
| 15. | The distance and direction to this tag. |
| 16. | Tap this if you want to scan a barcode. |
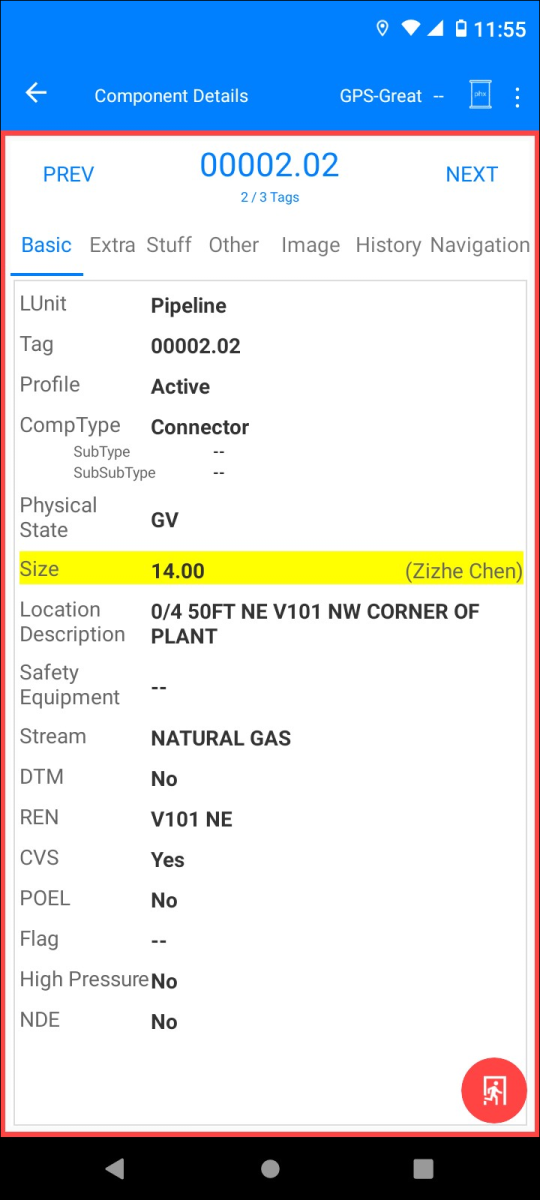
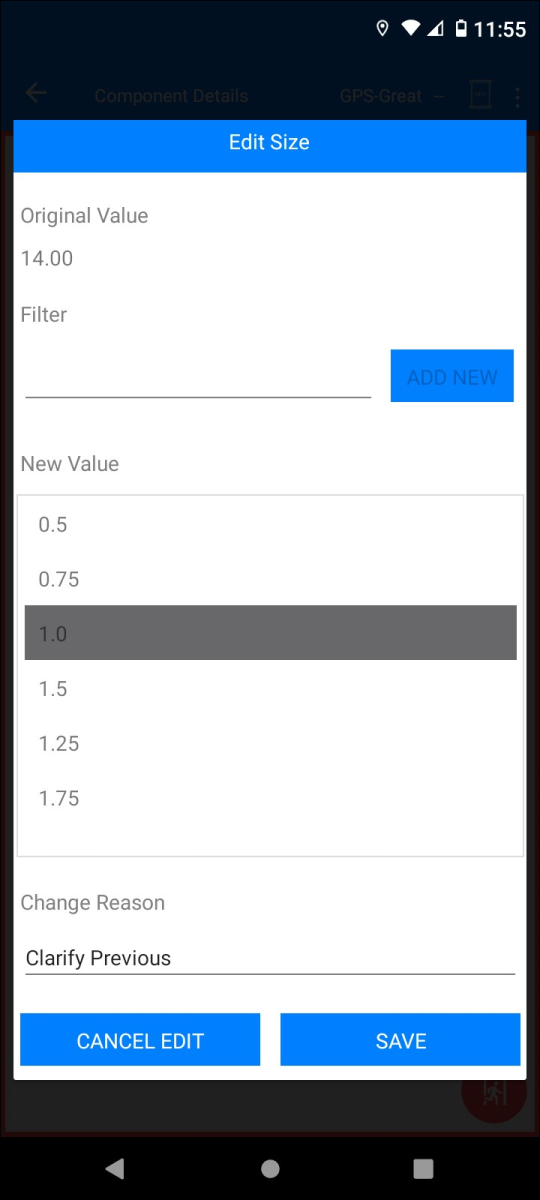
| 17. |
To edit the component, tap the pen icon, after which the Component Details page will have a red border, indicating you are in the edit mode.
Tap the properties to edit them. After selecting the new value for the property and the change reason, the Save button will become available. The changed properties will be marked in yellow with the name of the Suggester next to it. On the bottom right is the red, round-shaped Exit icon for exiting edit mode. The changed values will be synced to the database upon checking in. Depending on your MOC roles, it can be applied directly, or require the change to be cleared by an Approver. |
| 18. | AVO inspection information. You can see whether the inspection is scheduled or not here. |
| 19. | Shows what type of AVO inspection is required, or if the tag is not scheduled. |
| 20. | M21 inspection information. You can see whether the inspection is scheduled or not here. |
| 21. | Shows what type of M21 inspection is required, or if the tag is not scheduled. |
| 22. | Tap here to record a background reading. |
| 23. | Sample time is displayed here. |
| 24. | The Net PPMm is displayed here. |
| 25. | Tap here to begin monitoring the component. If the M21 option is in blue, you will be doing an M21 Inspection. If the AVO option is blue, you can record an AVO Inspection. |
Chateau
Was this article helpful? If not, please submit feedback below. For any support-related inquiries, please email support@ldartools.com.
Previous