-
Decide how to organize LUnits.
Most create LUnits for each Compressor Station or Well Site in order to simplify reporting. If you are managing sites in different states or different clients in the same database, you can create a facility for each state or client and then create a plant for each region’s compressor stations and a plant for the well sites. Having a plant for compressor stations and a separate plant for well sites will make assigning rules easier.
Refer to the Location Units, Plants, and Facilities article on how to create facilities, plants, and LUnits.
-
In Settings / Picklists / Category = Component Type, unhide the “OGI Spot” value in the Type picklist so you can schedule OGI Inspections on “groups” of components needing to be imaged.
Add any new component types technicians will need to add components for leaks, such as a thief hatch.
Refer to the Picklists article if you are unsure how to unhide.
-
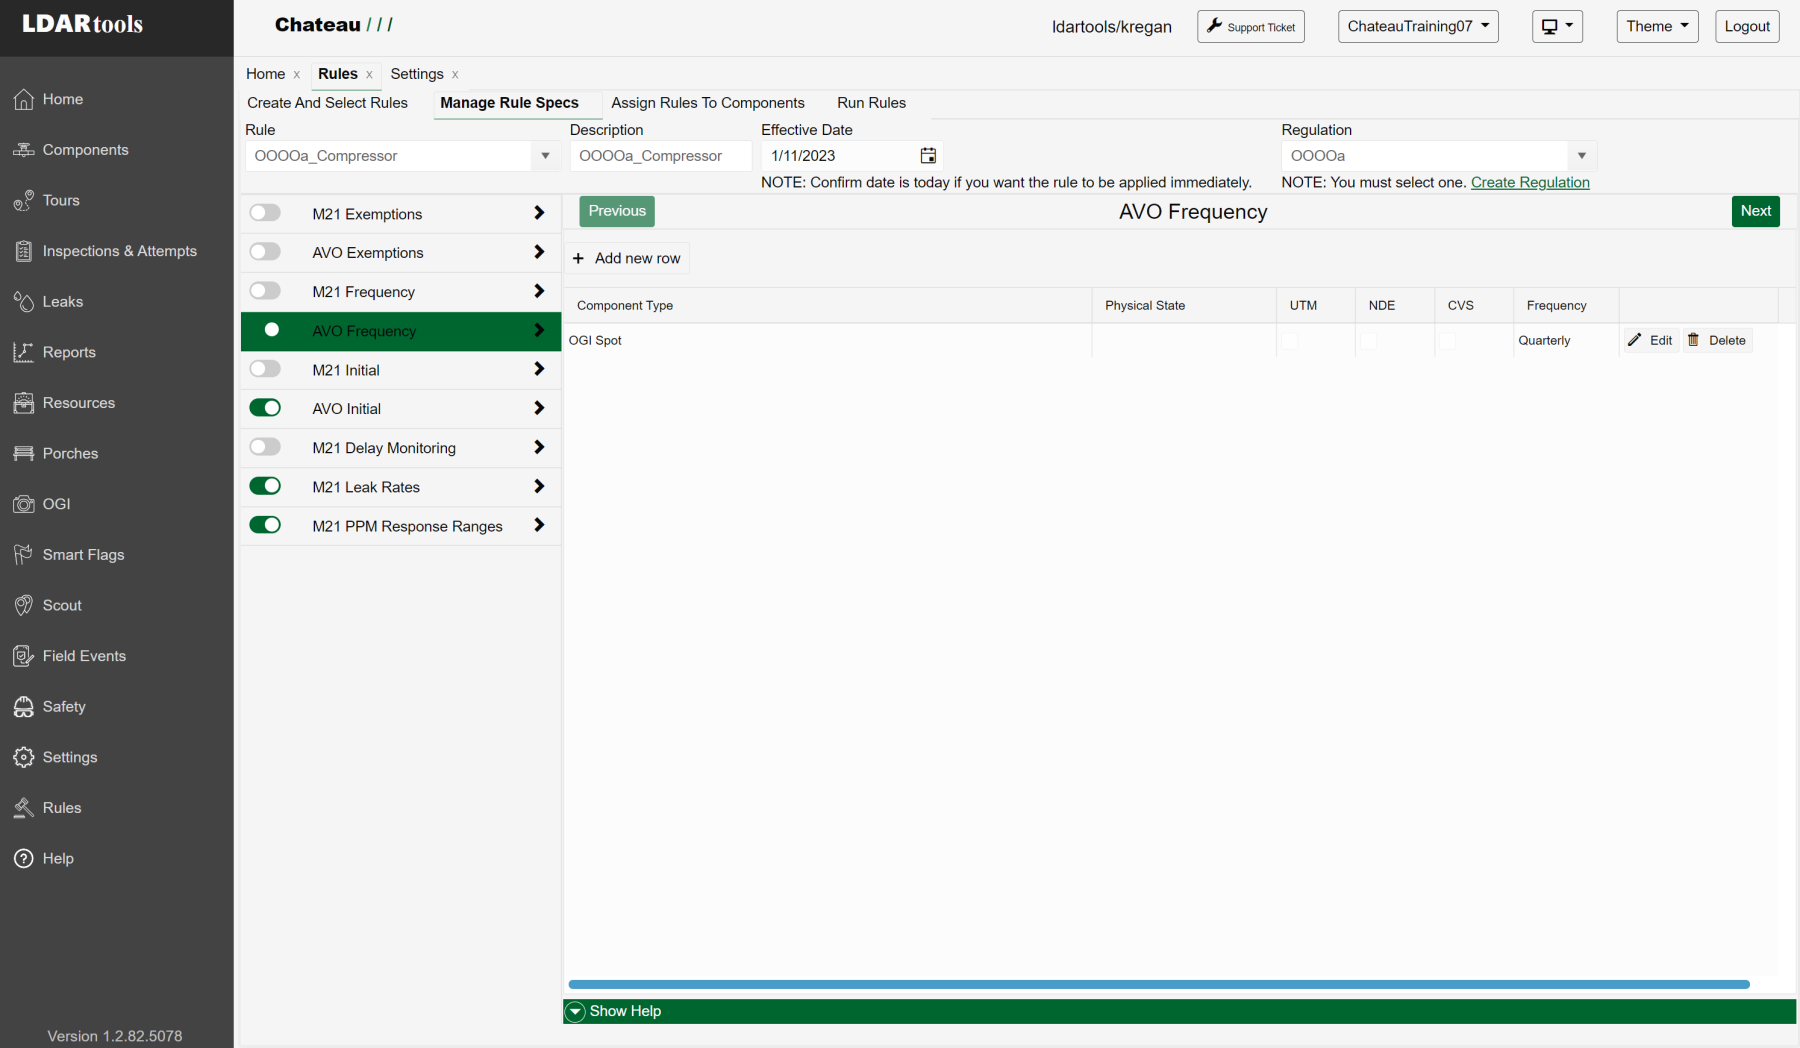
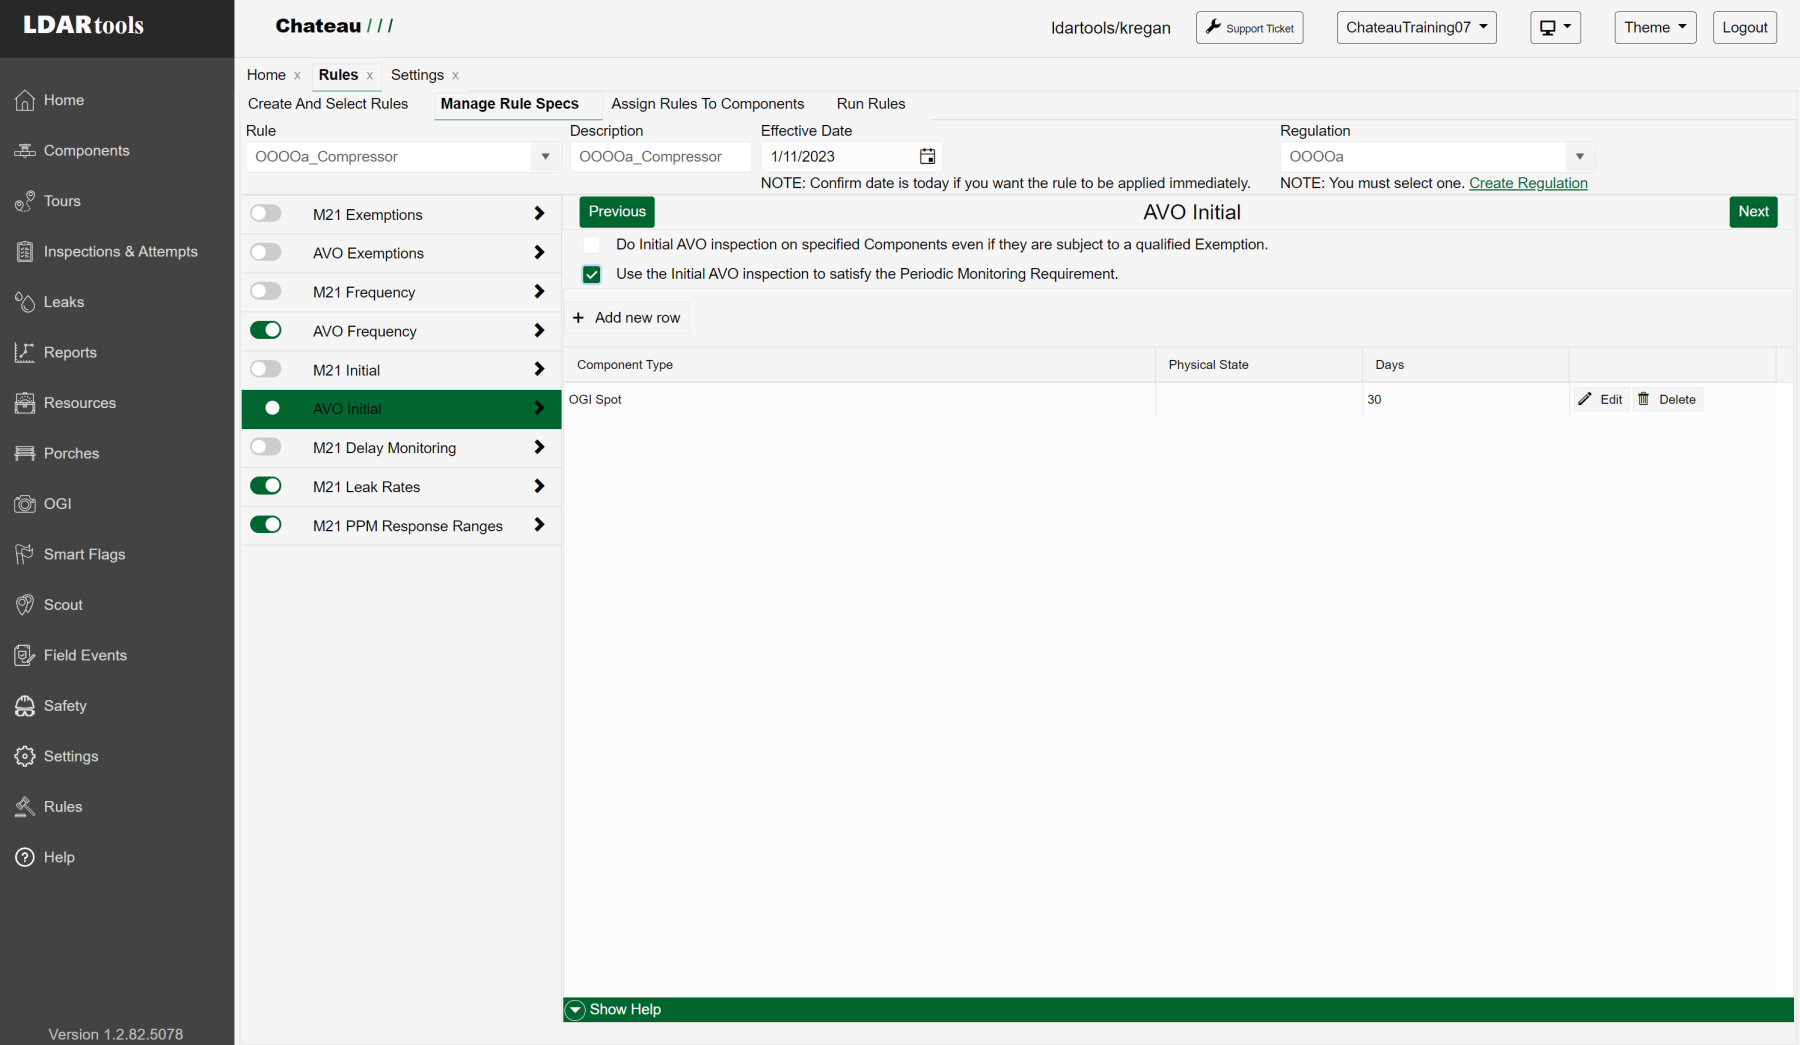
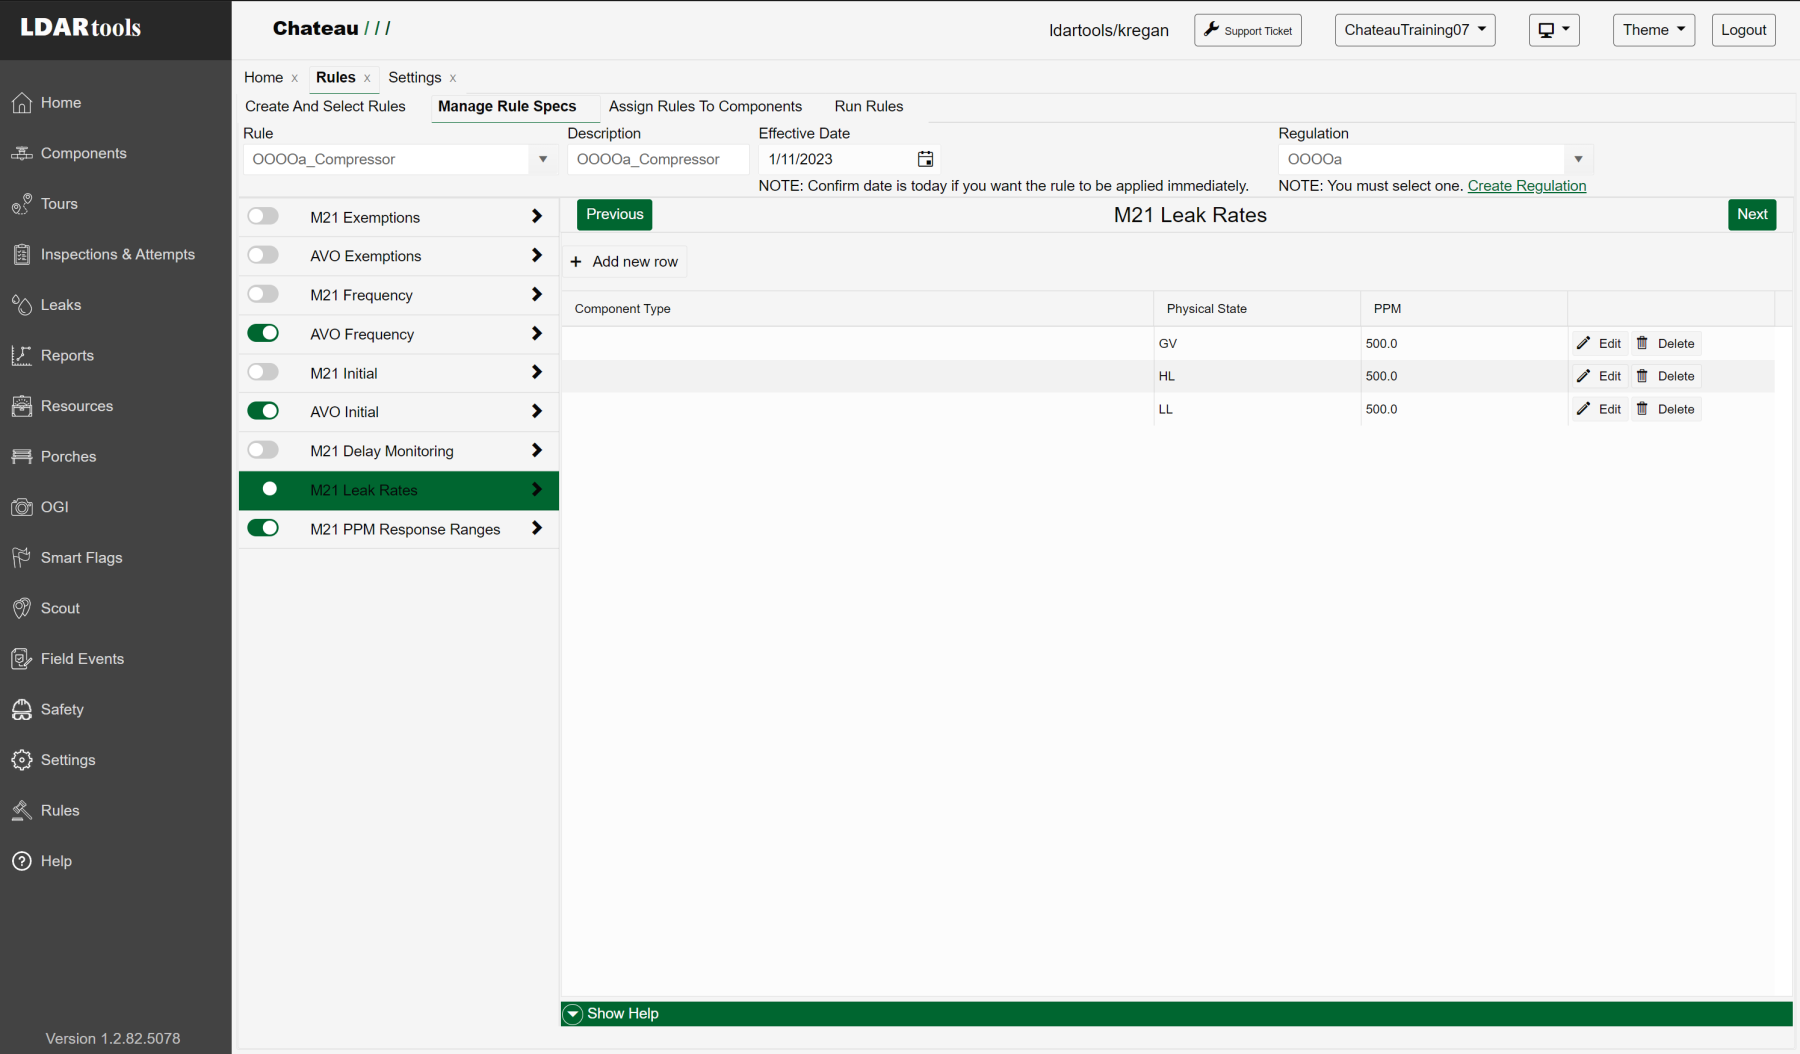
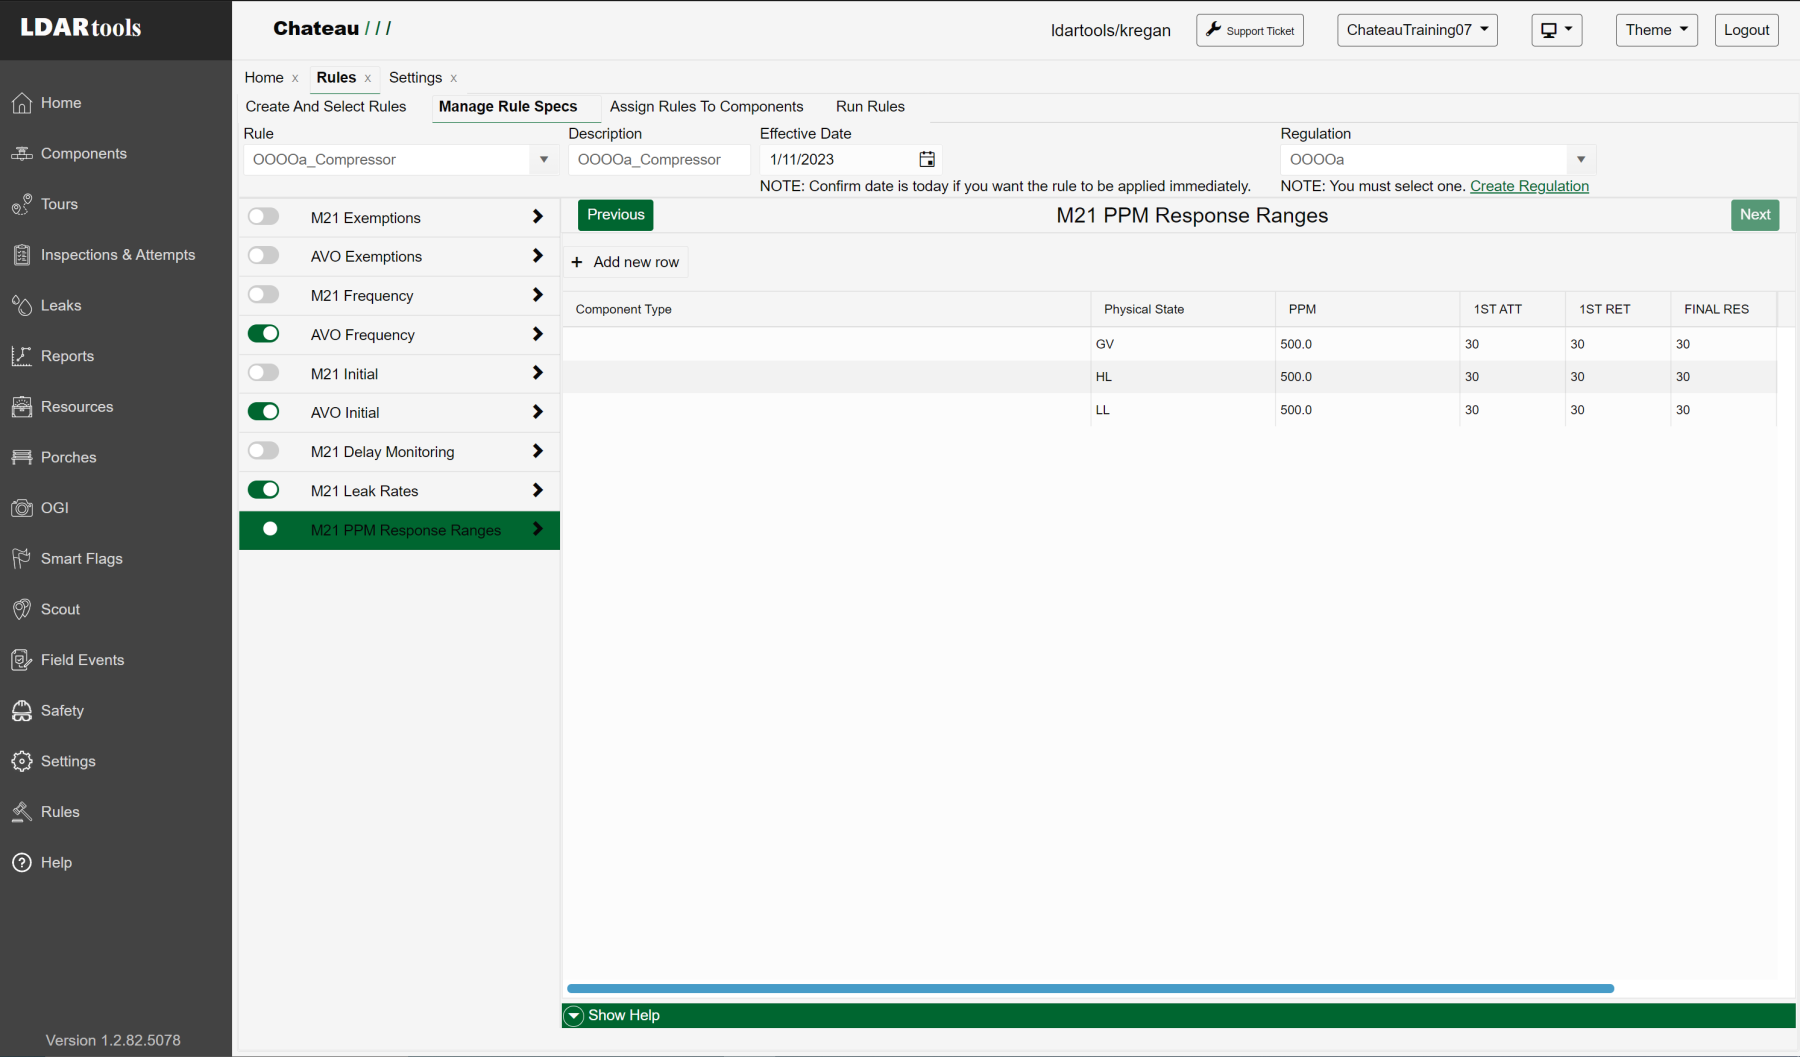
Set up your rules according to the screenshots below.
For site requiring quarterly inspections, such as Compressor Stations.
For site requiring semi-annual inspections, such as Well Sites.
-
Assign rules to components.
If you have broken up the Compressor Stations and Well Sites by Plant, then you can assign each rule by Plant and select the Compressor Station ones for the quarterly rule and select the Well Sites for semi-annual.
-
In Resources / Chemicals and Resources / Streams, create a Chemical and Stream. Then assign the Stream a Detector Type = FID.
- Note: You can call it the Default Stream.
You can assign OGI Spots to that special Stream and Chateau will be able to create detector-specific Tours marked as needing a camera.
- Note: You can call it the Default Stream.
-
In Settings / Picklists / Category = OGI, enter the values for all the picklists so technicians can record their OGI Sensitivities.
-
Go to Porches / Audit Settings and enter “OGI” in the Search box. Then turn on the audits you want to use.
-
Go to Porches / Audit Settings and enter “DOR” in the Search box. Then turn on the audits you want to use.
-
In Settings / Chateau Mobile Fields, select the precise fields you want transferred from Chateau to Chateau Mobile.
- Recognize OGI Spots are inspected, but they don’t Fail or Leak. You have to identify the component that is actually leaking, add it to the database, and post a Failing Inspection on that component. Record as Done when finished with imaging an OGI Spot.
- Review the differences between a Target Image and an Inspection image via the Images/Video article.
-
In Chateau Mobile, check out on the sync screen and send the technician to the sites to create OGI Spots for each LUnit and perform the initial surveys.
Have the technician refer to the procedure in the Chateau mobile manual article.
-
Import OGI Inspection images and videos tagged by the tech.
Refer to the Images/Video article for details on different image and video types.
Chateau
Was this article helpful? If not, please submit feedback below. For any support-related inquiries, please email support@ldartools.com.
Previous


